Description

A little of This & a little of That... From Products to Ponders. You never know what you will see at "Just a Spaz". Be sure to tell all your friends!

Tuesday

Make Eco bags out of T-shirts


Eco Grocery bags


http://promote.ecrater.com/p/4769569/custom-recycle-bag-green-bags?keywords=bag#Next time your clerk at your grocery store asks if you prefer "paper or plastic" ,give an eco-friendly answer by saying, "neither."
Plastic bags end up as garbage that messes up the landscape, and kill thousands of marine mammals every year because they mistake the floating bags for food. Plastic bags that get buried in landfills may take up to 1,000 years to break down, and in the process they separate into smaller and smaller toxic particles that contaminate soil and water. Also, the production of plastic bags uses millions of gallons of oil that could be used for fuel and heating.

Eco Green bags are made from many different materials. Canvas, cotton, any material. You can also use ond Tshirts or make "Plether" out of old plastic grocery bags. Crochet with it & make durable - washable grocery bags. You can also buy eco bags with your company name on them to give to customers!


Make your own Green bags from....

Old T-Shirts!


 You can make great Green Bags from old T-shirts or T-shirts you buy from a thrift store. You will need a t-shirt, scissors and a sewing maching. HOWEVER sewing is just 1 straight stitch across the bottom
Turn any T-shirt inside out and sew the bottom of T-shirt closed. turn the shirt right side and lay flat, making sure all seams are lined up together..

Next Place a paper plate size circle (bowl or cut cardboard) about half-way over the neck hole and use a marker to trace along the edge. Cut along the outline, Make sure to cut both layers because you want a bigger hole that the original neck hole.

Now line up the sleeves and cut on the seam.Cut off both sleeves. Sleeveless t’s work great since you don’t have to cut them off & they are nice & hemmed.

Ta-Da- you now can save a favorite T-shirt… just re-purposed as a green bag.


Monday

Fun Postcards are a great way to stay in touch

Stay in touch the "old fashioned" way

Fun post cards are a great way to stay in touch with friends & family. Everyone still likes to get a special card in the mail. My daughter LOVES getting a postcard from me when I am out of town. They make her feel special.

So take a look at some of these adorable cards for any occasion & they are sure to make your friend or family smile & remember your thoughtfulness.
 

Postcards ...

Not just to send but they depict history as well.

Postcards are cheap to send & don’t take long to write. A quick “Thank you” – “I Love You” or “Thinking of you” is always appreciated. Cheaper stamps & no envelope required.
The United States introduced postcards in 1873… 3 years after European countries. 2 years later in 1875, delegates of 22 different countries met in Switzerland & agreed to adopt a universal postage rate so that everyone could send a postcard to other countries & all postage was at the same rate.

Postcards became a way to send friends and family a small picture of their trip to lands abroad.
They also became a way for researchers to discover events that happened in history. Photos of the aftermath of great floods & other natural disasters were common on postcards in early 1900′s.

To see the real history of postcards, you can visit the Smithsonian Library or Cooper-Hewitt National Design Library. There you can find over 10,000 postcards in their collections. Dating from the turn of the century to present, you can find a lot of history from small little cards.


While Traveling...

pick up unique cards to send out.

 
Going to a unique place? Landmarks, restaurant, museum, zoo…. be sure to pick up postcards to remember your trip. Always keep a book of stamps in your purse or wallet. When you get back to your hotel – write a quick note to family & pop it in the hotel mail. Let them know you are thinking about them.

Great for scrapbooking as well. Your memories can be saved forever & enjoy the trip all over again as you look through your scrapbook. I still look at the postcards I have in my scrapbook from a trip I took with my grandparents coast to coast. That was over 40 years ago & I still remember that summer trip as I look at those old postcards I collected.


Send Postcards for Special Occasions

Valentines Day or "I Love you" Postcards for the ones you love!

Lady bug Valentine Post Card
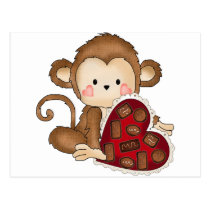
Monkey love post card
Ladybug love post card


Sunday

Green Chili... the best around!

The flavor of green chili really depends on the kind of green chilies you use. There are about 200 varieties of chilies, only three or four of which are commonly used in green chili.

I have tasted many green chili recipes but this one is, by far, the best. Add more or less heat depending on your taste.
Serve as a soup with a tortilla or slice of french bread dipped in. You can also simply pour it over your burrito.


My Favorite Green Chili Recipe

Bowl of Green Chili Things you’ll need:

1-3 lb pork loin or tenderloin roast
Olive oil
Cumin
minced fresh garlic
salt & pepper
flour
2 cans whole tomatoes
fresh roasted chilies
Large fry pan
2 larger Dutch ovens or roasting pots.


1: Prepare a Slow roasted Pork roast first. Allow 3 or 4 hrs for this part. Preheat Oven to 325 degrees
Rub pork roast with olive oil. Rub about 1 Tbsp of cumin and 3 or 4 cloves of minced garlic all over the roast. Sprinkle with salt & pepper.

2: SEARING… will keep juices inside & keep the roast tender.
Heat a few Tbsp of olive oil in a Fry pan & let it get hot (sprinkle a bit of water to see if it sizzles).
With tongs, put in your roast on 1 side for about 3 min. Turn for another 3 min, then hold with tongs & sear each end for 3 min each end. Put in Dutch oven or roaster, cover with water. Put lid on pot & slow cook for 3 or more hrs. To test if it’s done… it will pull apart with 2 forks. DO NOT DRAIN YET.

3: GREEN CHILI
Use a new pot on the stove… Add 2/3 c. olive oil & heat, add more minced or crushed garlic (to your taste or a couple cloves)Stir for about a minute. Add 1/3 c. flour, whisk & heat till light brown. Add 4 c OF THE WATER FROM THE ROAST. Whisk as you pour. Open the 2 cans of whole tomatoes & squeeze through your hands into chili pot. This way they are not too chopped up. They are the perfect texture.

4: THE PORK… using about half the roast… shred apart with 2 forks.
Add to pot. Keep the rest for burritos or pulled pork sandwiches.
Chop about 4 or 5 fresh roasted chilies… clean out veins & seeds. (or 1 can diced) add to pot. Add more salt to taste… Stir & simmer for a while. Make sure you stir so the bottom does not burn. Enjoy

5: IF GREEN CHILI IS TOO THICK OR THIN…
If too thick, just add a small amount of the “roast water” or plain water until the desired consistency.
If too thin, in a small bowl or cup… add 2 Tbsp of softened butter & mix in 2 Tbsp flour. Make a paste & as your chili is simmering, add 1 Tbsp of flour mixture to chili & whisk. If you need more, add the rest.
I like mine about the thickness of a cream soup. Some like it really thin, closer to a broth.

Tips & Warnings

Add more chilies or a bit of canned diced jalapenos for more heat.

Pour over Burritos to make smothered burritos.

We like eating as soup with tortillas or french bread dunked in it.

Next day if it’s too hot & spicy… you can add water to cool it down.

Hotter & Spicier the next day.


How Hot is Your Chili Pepper?


scoville heat scale 
The Scoville scale is a measure of the ‘hotness’ of a chili pepper or anything derived from chili peppers, i.e. hot sauce. The scale is named after Wilbur Scoville who developed the test in 1912, for more information see Measuring Chili Heat.
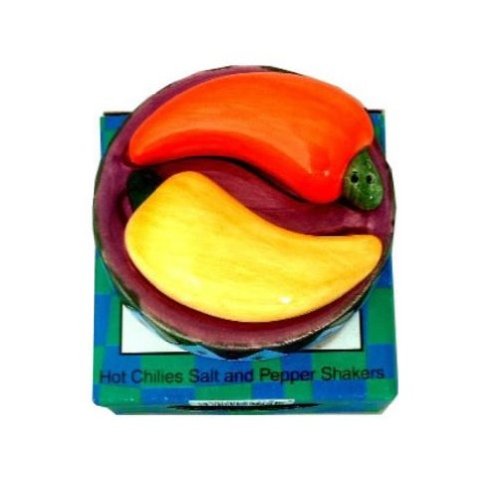
Hot Chilies Salt and Pepper Shakers 3 Piece Set
 

Added touches to your kitchen decor will make you proud to have guests over

Whether your kitchen decor is contemporary, modern, cottage, traditional or eclectic... make sure it reflects you and your family.
Not only paint color & appliances but all the extras you need to add will bring your kitchen to life. Be proud to have friends & family over for dinner parties or the holidays. Some of these decorating ideas will help you do just that.


Old Silver Spoon...
Ellen Silverman
Buy This at Allposters.com


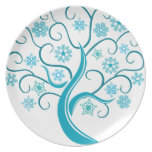
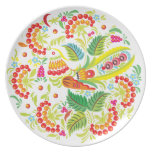
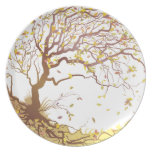
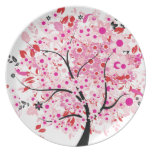
Perfect for celebrating a special occasion or create a one-of-a-kind set, dishwasher-safe plates in vibrant full-colors . Adorn your kitchen or dining room with these beautiful plates today! See more at Diramswares
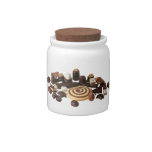
  Blue Tree Dinner PlatesTomtit PlatesFlowerful Dinner PlatesPurple Tree Party PlatesPizza Dinner PlatesLeaf Splatter PlateTree and Wind Party PlateBlack-Purple Tree Dinner Plate Keep your snacks and treats cute candy jar from Zazzle. Made of white porcelain, this candy jar has a brilliant luster designs look wonderful.  


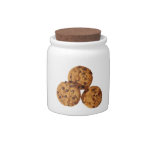
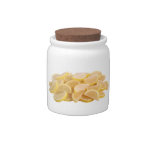
Dishwasher and microwave safe, your candy will be kept fresh in these candy jars. * 10oz. Cork lid included. * 100% bright white porcelain. * Dishwasher safe and microwave safe.

   Treats Candy JarsChocolate Chip Cookie Jar Candy DishesLemon Slices Marmalade Candy Jar


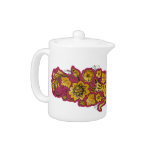
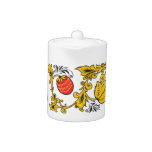
Enjoy tea time with a unique tea pot from DiramsWares on Zazzle. Made of bright white porcelain, these tea pots look amazing with vibrant designs. Dishwasher and microwave safe, this tea pot is ready to add a touch of flair to your kitchen. 44oz. (med) or 11 oz (small) 100% bright white porcelain. Dishwasher safe and microwave safe. 
Purple and Gold TeapotStrawberries TeapotAbstract Teapot

Saturday

Popcorn or Kettle Corn in Dutch Oven


At Home or Camping, a GREAT Treat! Hot Kettle Popcorn!

 Skip the Wienies on a stick over the fire while camping. Take your Dutch ovens and have Gourmet meals, Snacks & Desserts while enjoying the outdoors. Kettle corn over an open fire is a great late night snack.

Kettle corn was introduced to the USA in the 1700's. It was referenced in the diaries of Dutch Settlers in Pennsylvania.
It was a special treat at fairs or other festivals. The popcorn is cooked in iron kettles and then sweetened with sugar just before it starts popping and adding salt.

In the early 1900's, kettle corn has made a comeback in America, As of 2000, it is cooked and sold at fairs and flea markets throughout the United States, especially art and craft shows. The microwave version is sold at grocery stores by Orville Redenbacher's, Act II, and other brands.... but homemade is always the best.
Things you'll need:

Medium or large seasoned Dutch oven with lid.
oil
popcorn
sugar
salt
wooden spoon
oven mitts
camp fire (if camping)
*******************************************************************************************
1: In your Dutch oven (or pot when using a stove)... add vegetable or canola oil to cover the bottom & add popcorn.

2: Put oven on hot red coals (not flames) Or heat on stove on med high... & let it heat up until 2 or 3 kernels pop open.

3: Immediately add 1/4 cup sugar & with both hands covered with oven mitts... use one hand to stir with a wooden spoon & hold the cover with the other hand.

4: When it starts popping, sort of cover the pot with just enough opening to stir constantly. When it is popping in the kettle & not popping out, take off lid & keep stirring until it's done popping.

5: Dump into bowl, toss with a little salt & enjoy!!!

Tips & Warnings
perfect opportunity to get to know your neighboring campers! They will smell this all over the campground.
Be careful while eating, unpopped kernels stick in the popped popcorn